
Devpath provides Single Sign-On (SSO) functionality for enterprise customers to access it through a single Identity Provider (IdP) like Okta. This allows IT administrators to better manage team access and keep information more secure.
You can also refer to Okta’s documentation.
Okta Setup
Note: To set up the OKTA app you need to be logged in on Okta with an enterprise admin account. You should be able to see the admin dashboard.
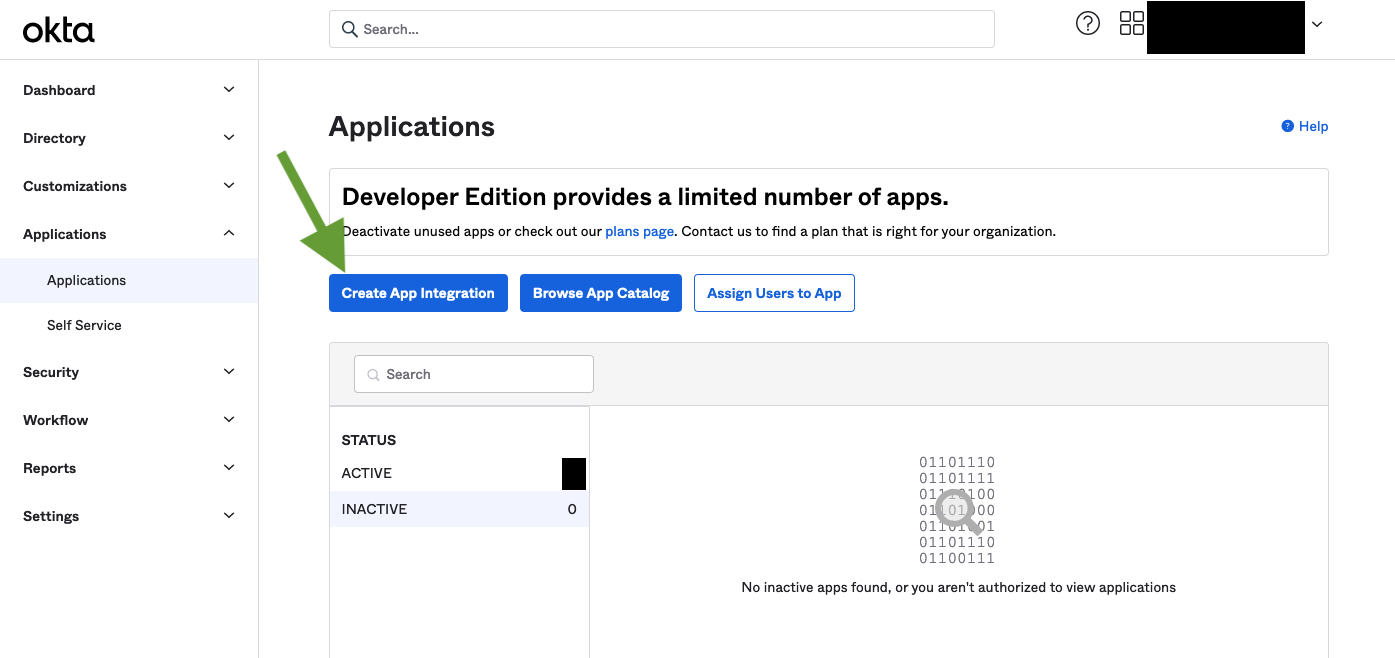
1. Create a new Application:
Direct URL: {your organization address on OKTA}.okta.com/admin/apps/active
or
Navigate to: Applications -> Applications from the Sidebar.
- Click on Create App Integration
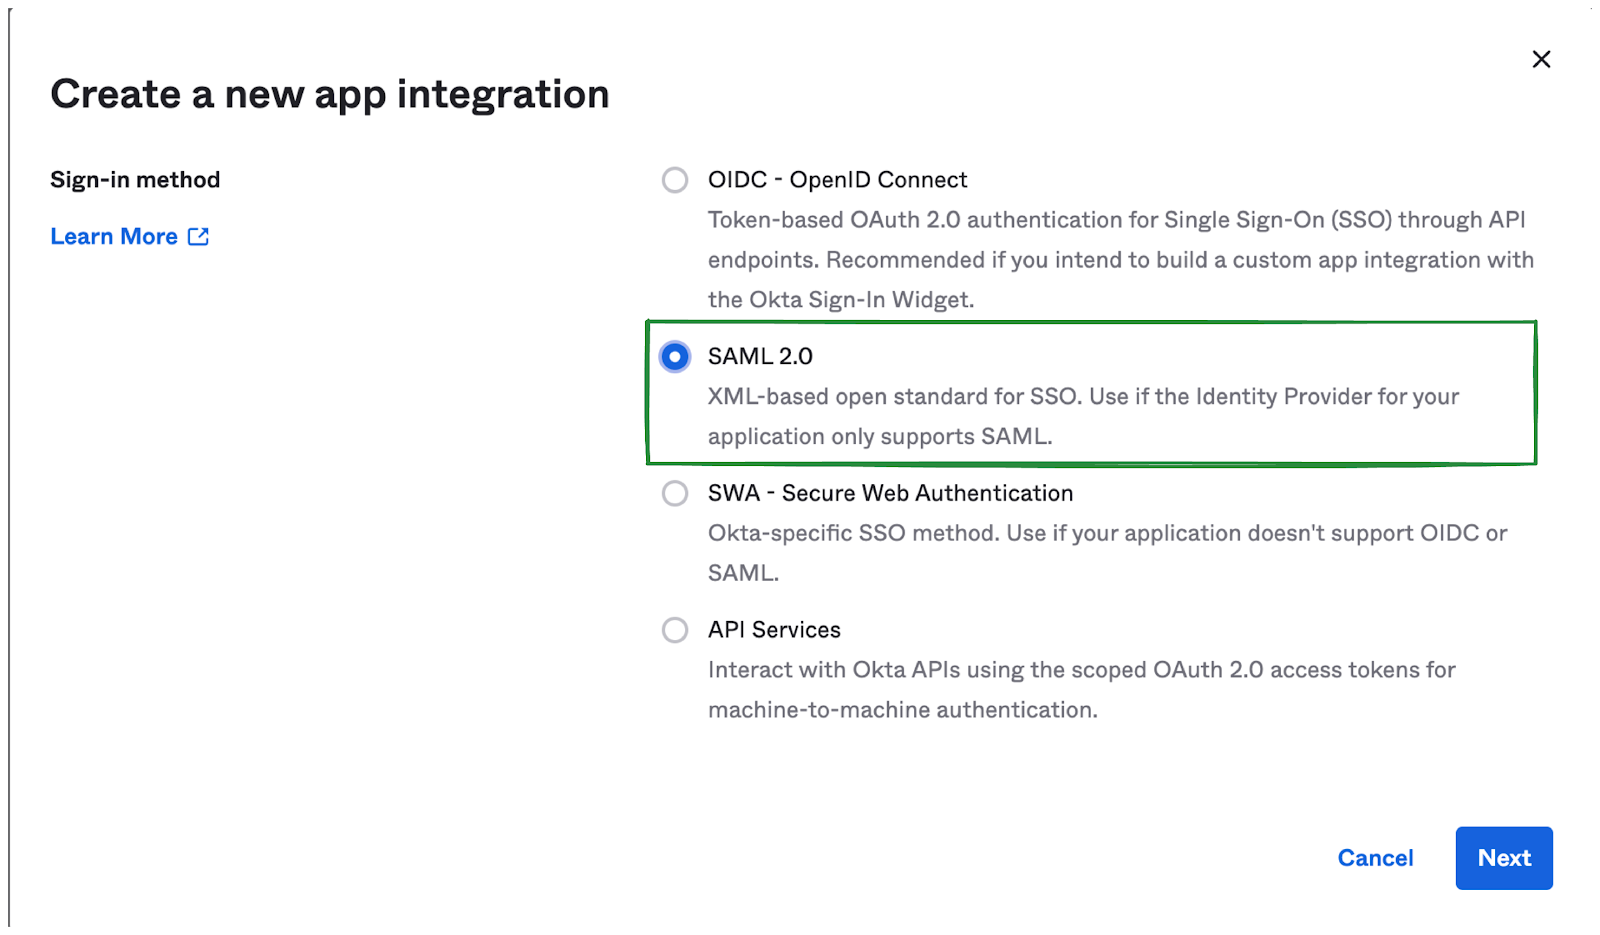
2.App Configuration
- Select SAML 2.0 as Sign-in method
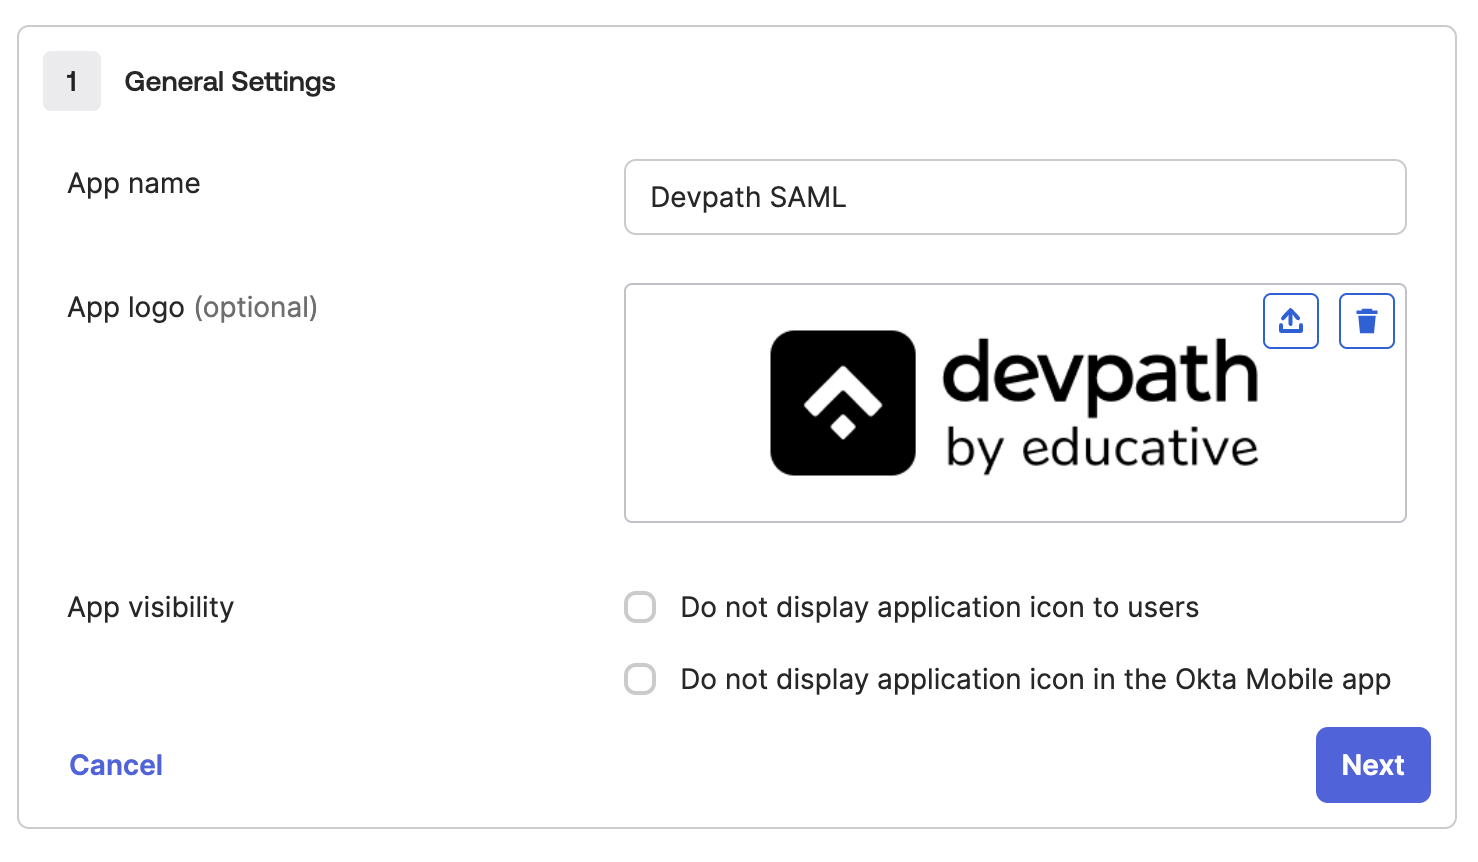
3. General Settings
- App name: Devpath
- App logo:

- Click Next
4. Single sign-on URL
You can get your Single sign-on URL by following the below mentioned steps.
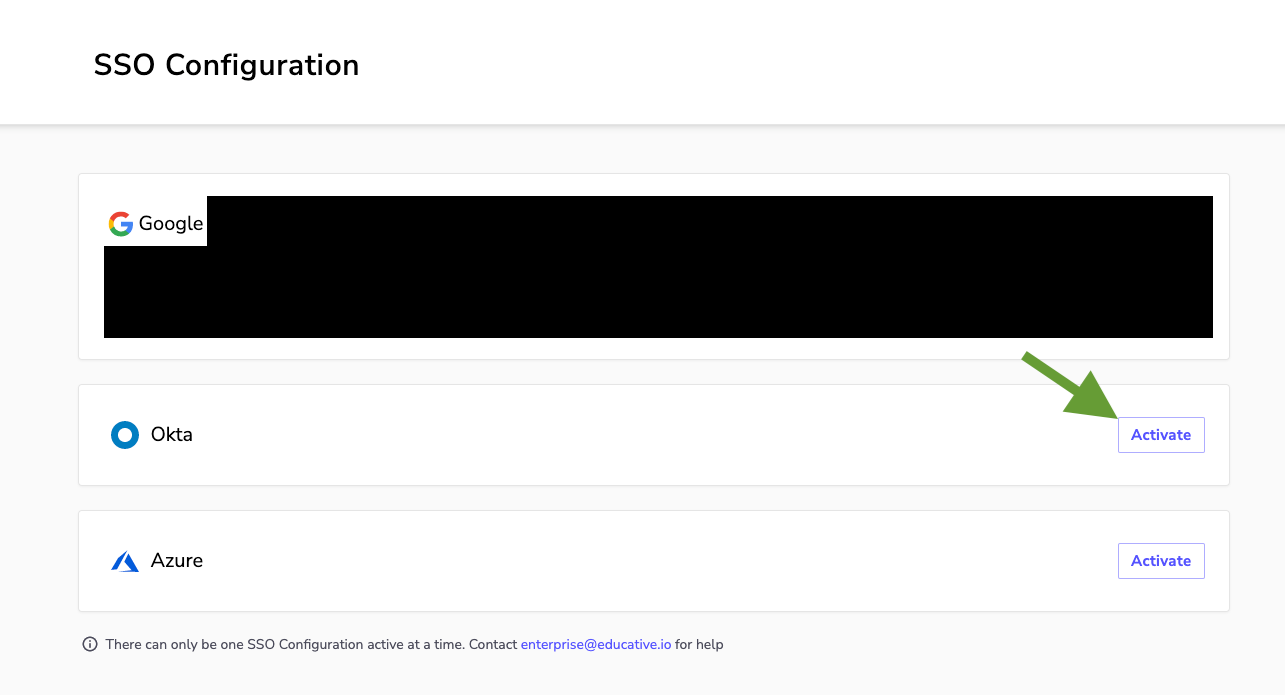
Go to: https://{subdomain}.devpath.com/manage/single-sign-on. Make sure you are logged in as the organization admin at devpath.com
- Activate Okta
You should be able to see the dashboard shown below. By default, OIDC is enabled.
- Choose SAML from the dropdown.
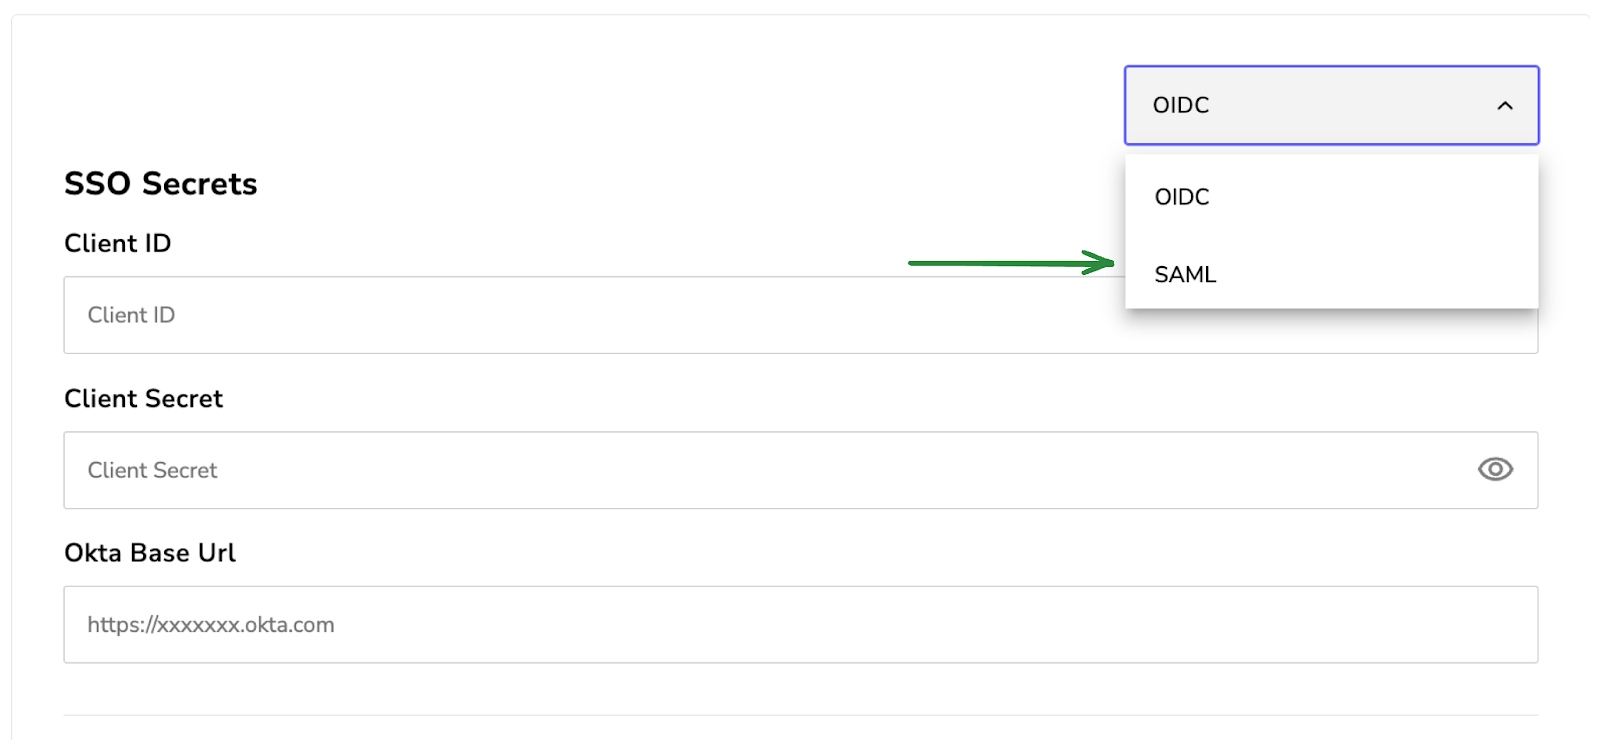
Once you select SAML, you should be able to see the Login URL field. Please copy the organization_id as highlighted below:

Replace the <org_id> in this URL: https://{subdomain}.devpath.com/api/sso/saml/<org_id> with the organization_id you have copied. For instance, if your organization_id is 123456, your Single sign-on URL would look like:
https://{subdomain}.devpath.com/api/sso/saml/123456
Now navigate back to your OKTA Application.
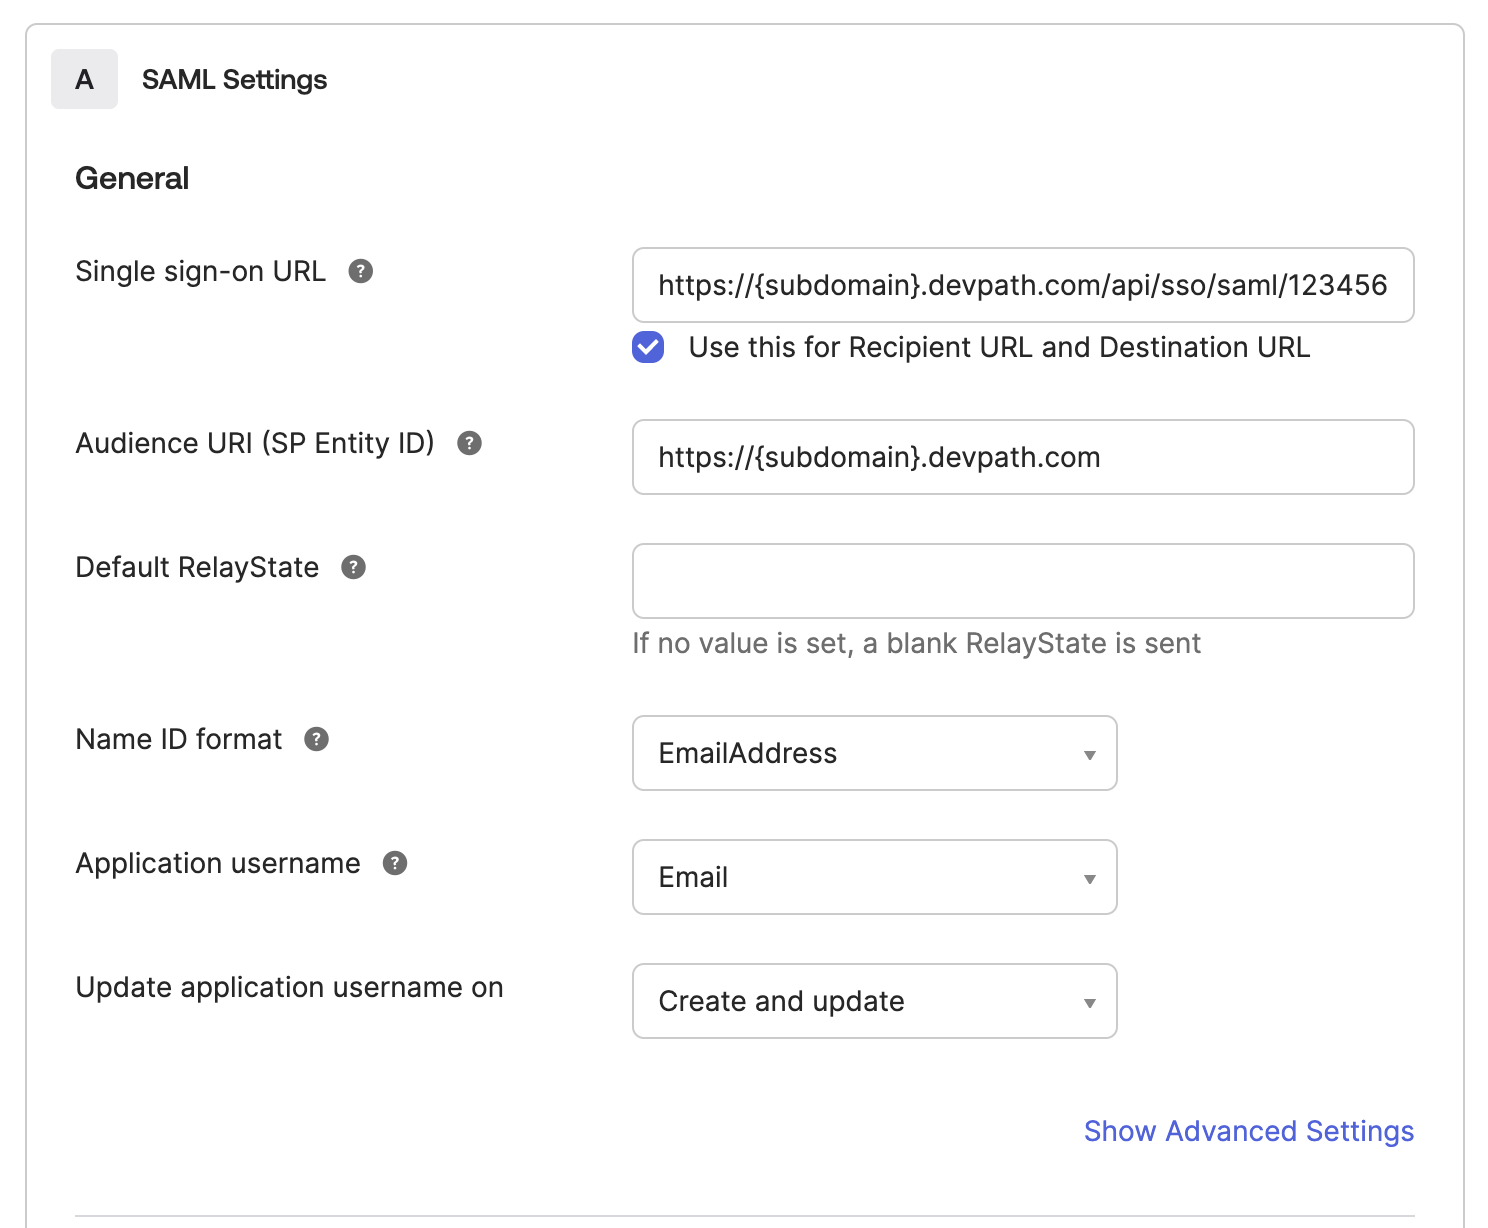
Under SAML Settings General section, please:
- enter the Single sign-on URL you have created in the previous step
- enter the Audience URI: https://{subdomain}.devpath.com
- check the field for Use this for Recipient and Destination URL as highlighted
- Attribute Statements
Below, you will see the Attribute Statements Section. Please add the two attributes required by DevPath. These are:
- first_name
- last_name
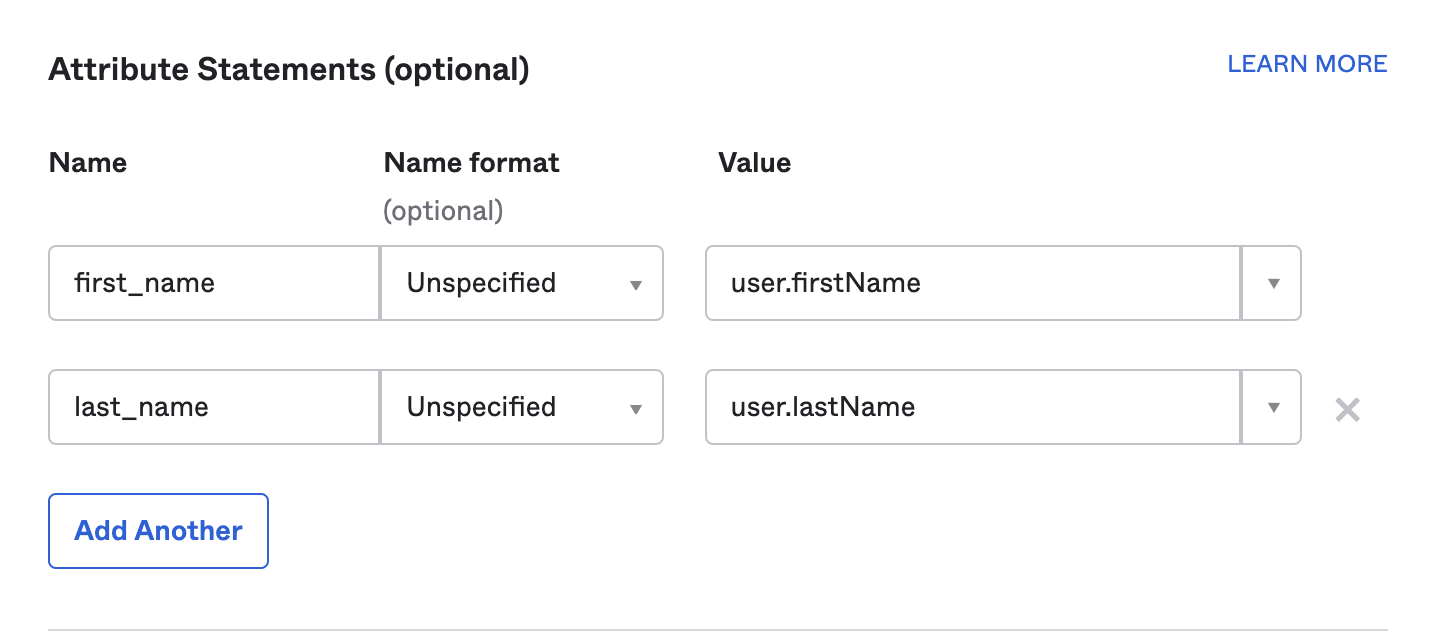
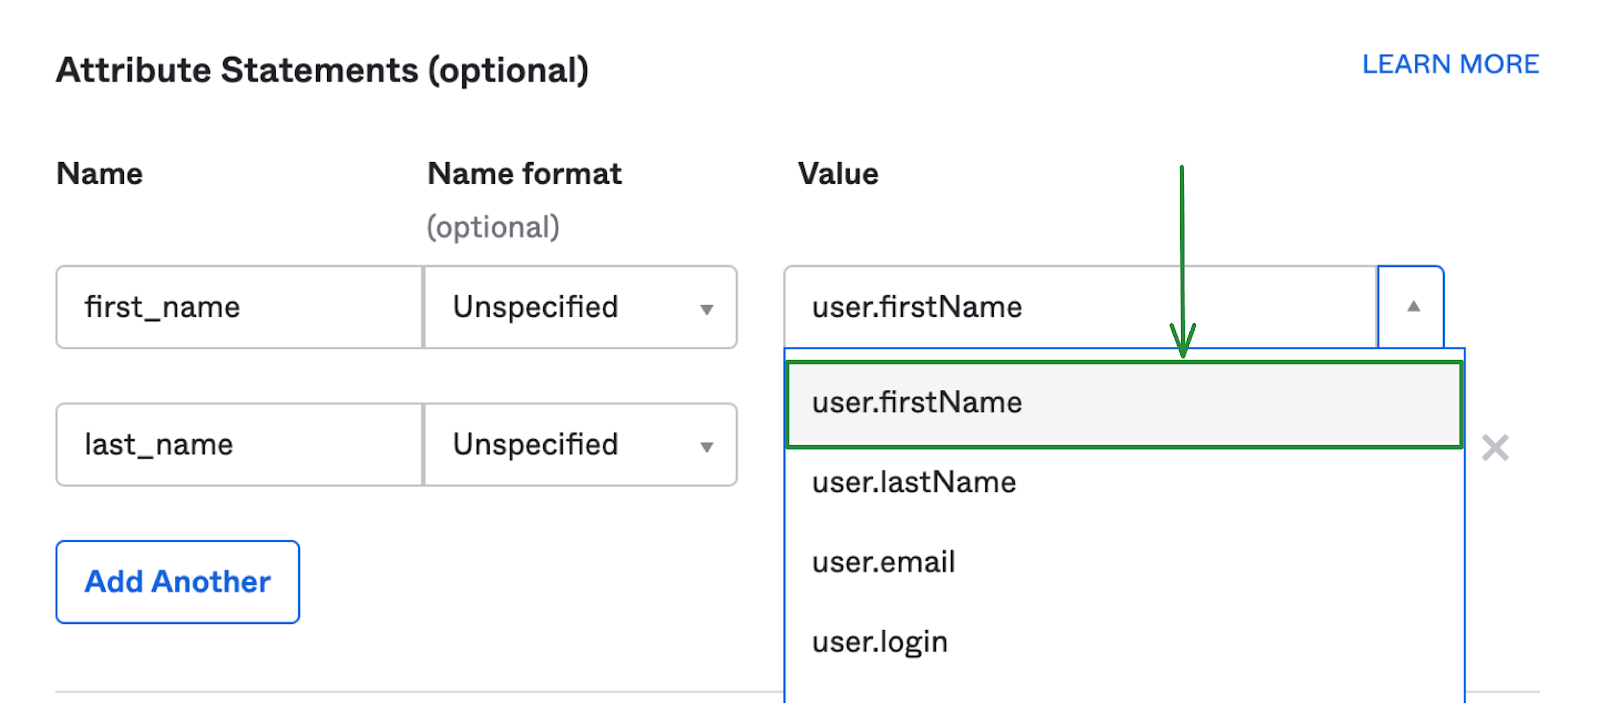
It is necessary that you keep the attribute Name as recommended by DevPath. Please also note that the Value must be user.firstName and user.lastName respectively. You can choose these values from the dropdown as shown:
- Click Next
- Feedback
You should now be able to see the Feedback section.

Choose your desired option and click Finish.
DevPath Setup
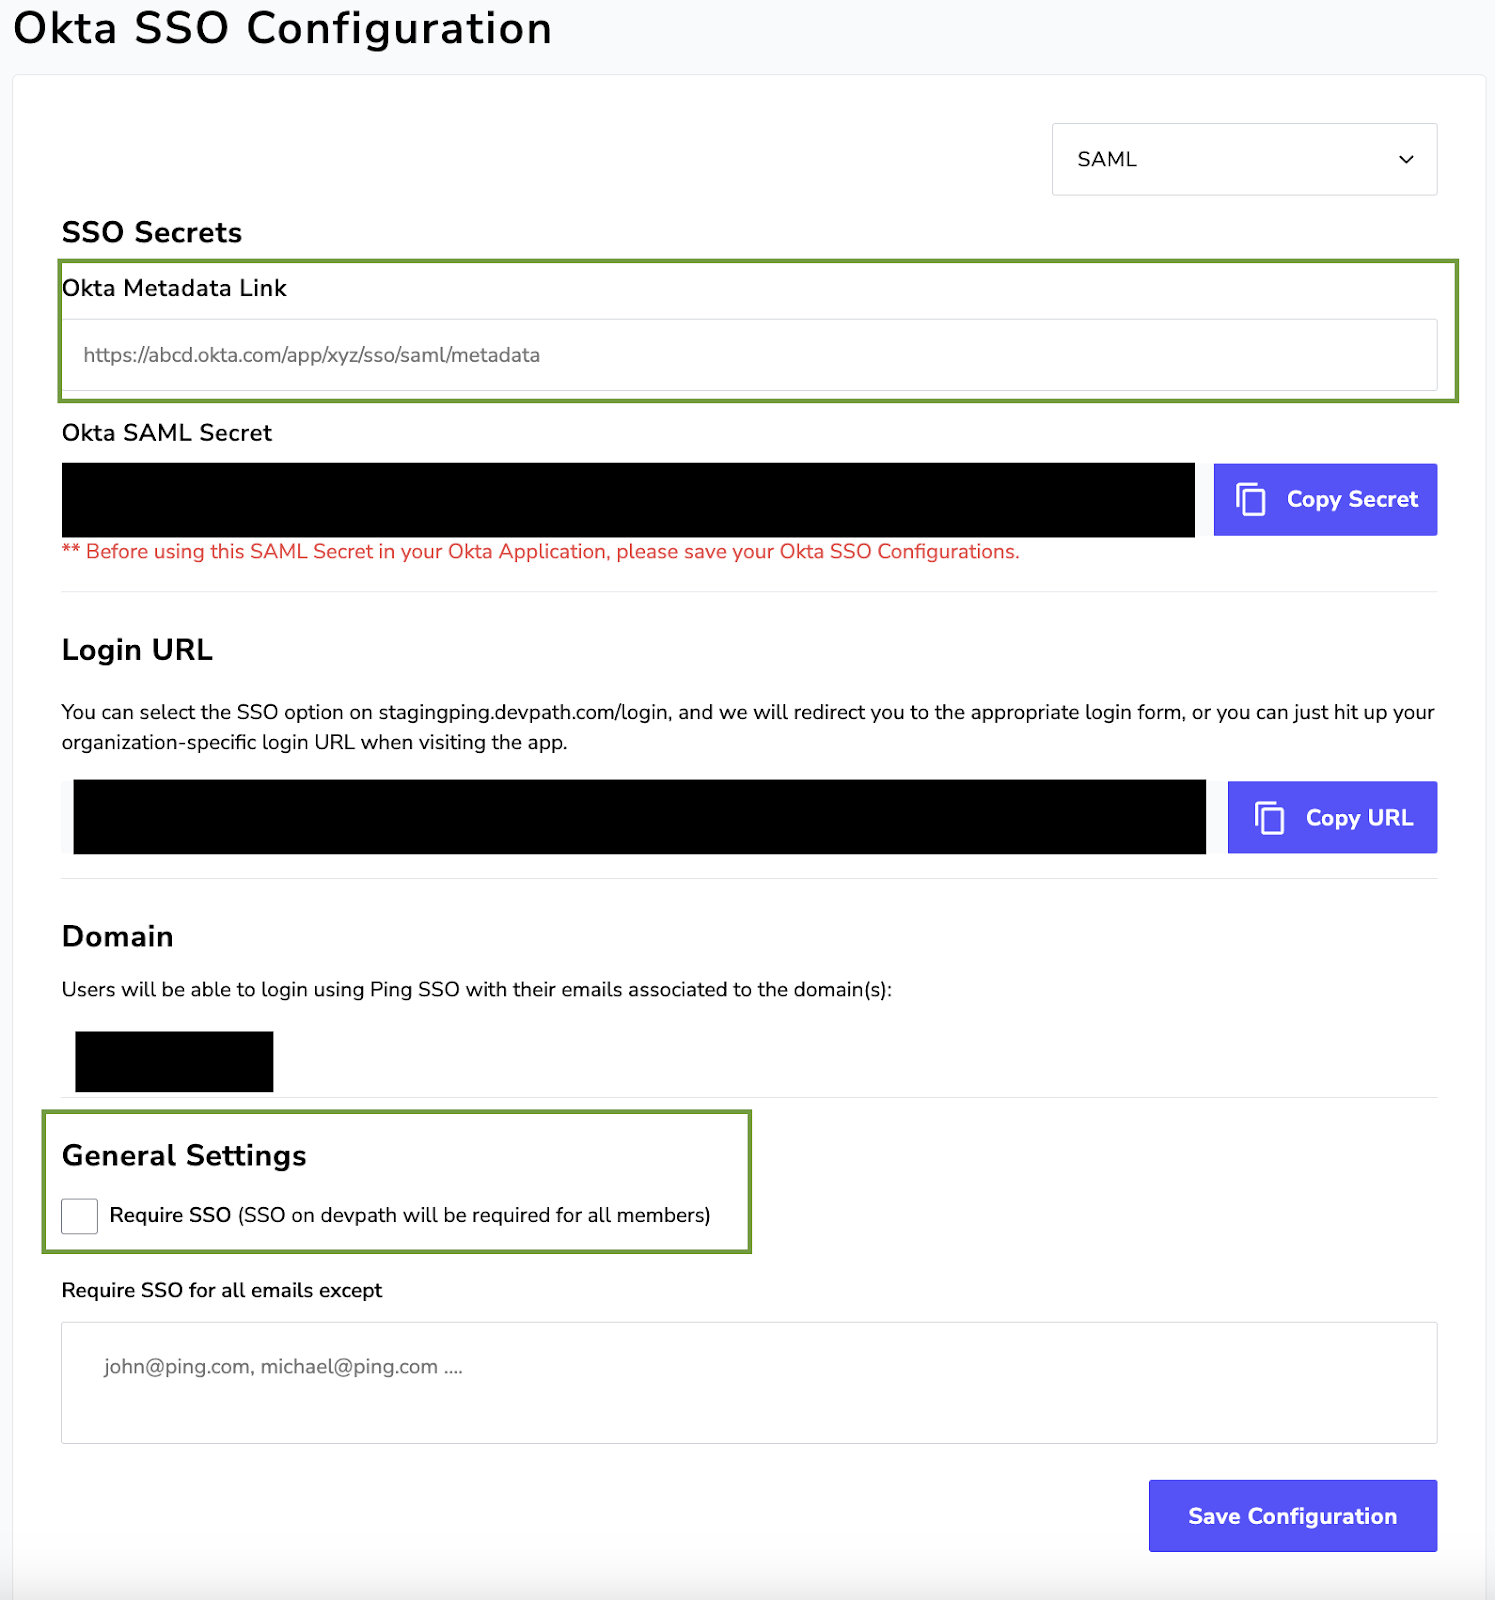
To establish a link between your Okta Application and DevPath, please enter the Metadata URL in your SSO Settings Tab on DevPath.
- Metadata URL
Upon successful configuration of your Okta Application, you will be redirected to the Sign On tab. Please copy the Metadata URL as highlighted below:

Please head back to https://{subdomain}.devpath.com/manage/single-sign-on
On DevPath’s SSO Settings, please:
- paste the copied link in the Okta Metadata Link field
- check the Require SSO field
- press Save Configuration
You have now successfully configured your Okta App for using SAML based SSO on DevPath.
DAuth from OKTA
To configure user de-authorization (DAuth) from devpath.com, you need to add an Okta Event Hook. This would allow your workspace user to be automatically removed from devpath.com in case you delete the user from your Okta workspace.
To configure DAuth, please follow the steps below:
1. Create a new Event Hook:
Direct URL: {your organization address on OKTA}.okta.com/admin/workflow/eventhooks
or
Navigate to: Workflow -> Event Hooks from the Sidebar.
- Click on Create Event Hook
You should be able to see the following form:
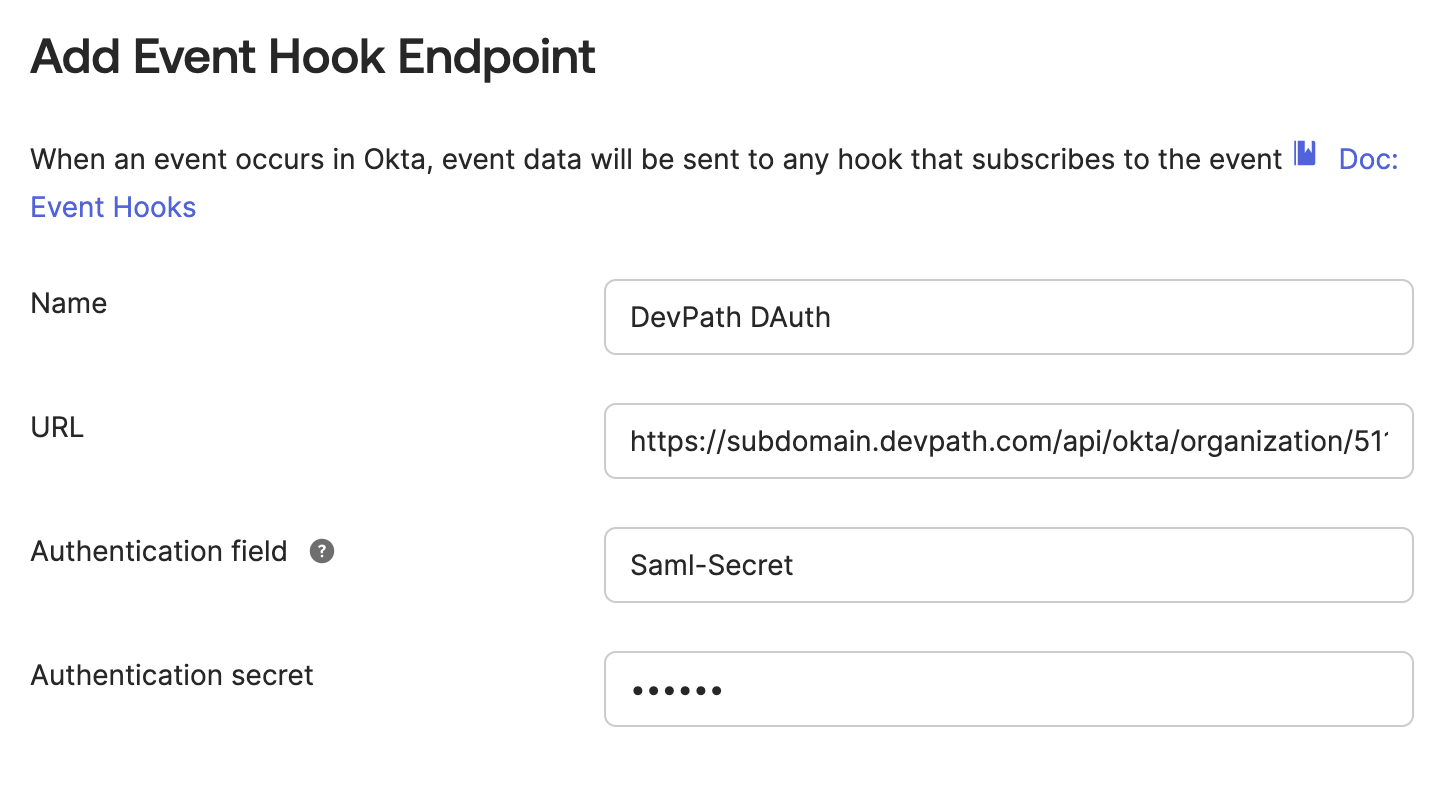
Fill out the relevant information in the form as mentioned below:
- Name: DevPath DAuth
- URL: https://{subdomain}.devpath.com/api/okta/organization/<org_id>/delete-user
Note: Please replace the <org_id> in the URL with your organization_id provided by devpath.com
(Refer to the steps mentioned in Step 4. Single sign-on URL above to determine your organization_id)
- Authentication field: Saml-Secret
- Authentication secret: This secret can be found on https://{subdomain}.devpath.com/manage/single-sign-on under Okta -> SAML -> Okta SAML Secret

- Now head to the Requests section in your Okta Event Hook Configuration.
- Subscribe to events: User deleted
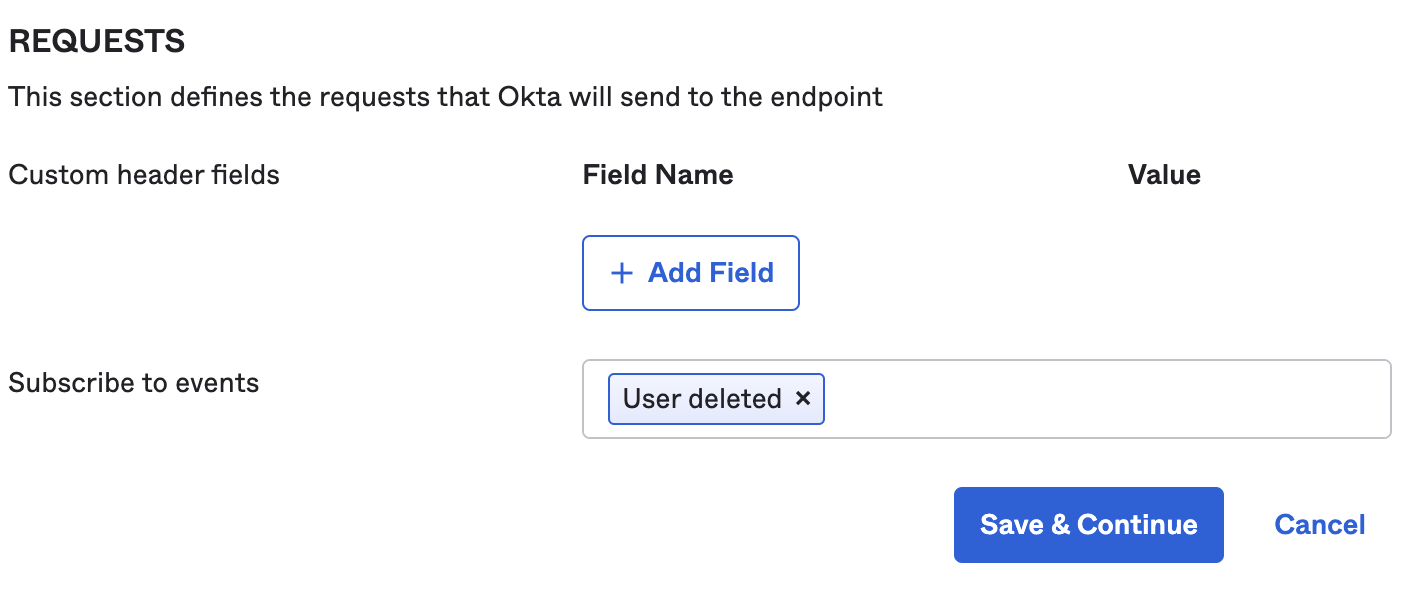
- Press Save & Continue
You have now successfully configured DAuth for your Okta SAML application. For further assistance, please reach out to us on support@devpath.com